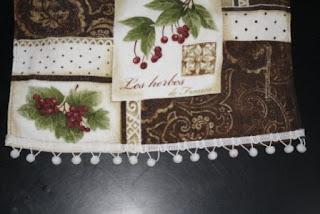
We spent a fun afternoon with our sister, SIL, mom, and aunt making these cute Dishtowel Cafe Aprons... so cute and very beginner (truth be told Missy did cry the first time we made these- she's WAY too much of a perfectionist).
I love making these for gifts. Pair it with a cake box, kitchen utensil, or favorite cookbook (depending on how much $ you want to spend) and you have a perfect gift for a teacher, neighbor, or friend. Now, on to the tutorial for the Dishtowel Cafe Aprons.
 |
| Dishtowel Cafe Apron |
ITEMS NEEDED:
1. Dishtowel (we found most of these cute dishtowels for way cheap at Walmart)
2. Trim (ruffle, ric rac, pom-poms, etc...) same as the width of the towel + 2 inches
3. 1.5 yards of coordinating fabric for the waistband (you will have enough leftover to make another apron)4. Matching thread
Cut your dishtowel so that it is 18"
Pin the trim on the bottom of the towel, wrapping it around to the back about 1" on both sides and sew
 |
| (did you notice I switched towels on you?) |
Pin the two strips right sides together, end to end, and sew (you have one LONG strip)
Iron the seam open flat
Fold the fabric in half (so your strip is now 3" wide) and iron
Open the fabric back up and iron in all raw edges about 1/2" (if you want to be fancy you can angle in your ends)
 |
| Here's just a square corner |
 |
| Here's one I did with a fancy corner |
Open the fabric strip and place the towel inside, lining the top of the towel with the fold of the fabric. Make sure the seam of the fabric strip is centered on the towel.
Pin the entire strip and sew (using a 1/4" seam allowance- which means you use your presser foot as a guide) around the edge of the strip (bottom, side, top, side)
Ta-Da! All done!
(This would be Missy's son modeling... what a sport)
Linking up:


5 comments:
Very cute! Visisting from Fun to Craft
That almost looks easy enough for me to not screw it up! I love cute aprons.
What a great tutorial! Love the result - ball fringe and all!
Cute! I'm always wishing I had a towel apron when I cook 'cause I wash my hands so often. This is perfect. Thanks!
What a cute idea! Nice tutorial.
Post a Comment